A Comprehensive Guide to ShopPop's Chat Editor [Updated]
![A Comprehensive Guide to ShopPop's Chat Editor [Updated]](/content/images/size/w960/2020/09/Comprehensive-Guide-to-POPs-Chat-Editor-blog-header.png)
Table of Contents
The Chat Editor’s components
Add text with button
Add gallery
Reinsert menu
Ask for user data
Display channels
Creating a Flow
Templates
Flows within Flows within Flows
The Persistent Menu
Replies
TL;DR - Check out the tutorial video at the bottom of this article 👇
How to start using the Chat Editor and become a conversational marketing superstar.
If you want to build a relationship with your audience, you have to start with a conversation. In chat, a conversation means you have to do more than blast your audience with a one-sided wall of text.
The most intricate part of POP’s tool is the intuitive and easy-to-use Chat Editor, which allows you to compose interactive conversation Flows.
To set you off on the right foot and teach you how to do more than broadcast simple, single messages, we compiled this comprehensive guide to the Chat Editor.
You ready?
The Chat Editor’s components
So you want to become a conversational marketing superstar? Alright, no problem, we’ll get you there, but let’s start with the basics. Next to the ‘Add attachment’ button in the Message section of your dashboard, you can click on the ‘Compose a Flow’ button to enter the Chat Editor.
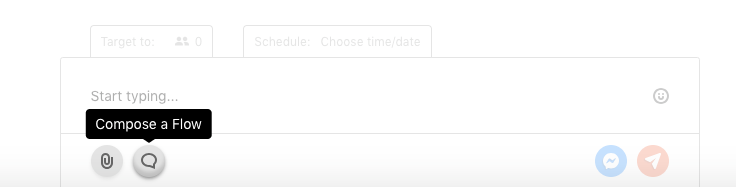
Here, you can start composing a linear progression of messages, each one able to contain text, several types of attachments, and a range of emojis, just like in the regular messaging section of the dashboard.
Just click on the + symbol to add a new message to your Flow.
When you do this, you’ll notice you have several options that aren’t available in the regular messaging section.
Let’s outline the functionality of some of these:
Add text with button
In the Chat Editor, you’ll be able to add text with buttons underneath. These buttons can trigger an action, like opening a website or calling a phone number.
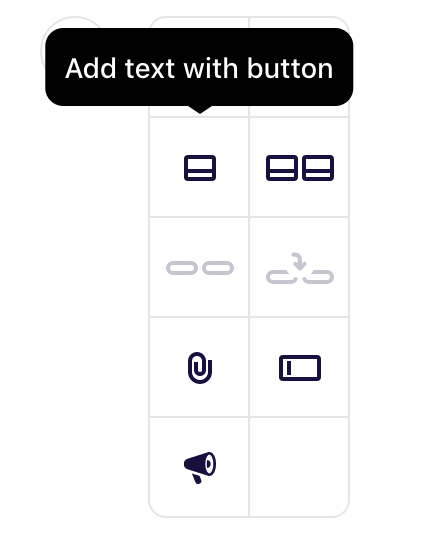
Super convenient for when you want to drive traffic to your website, your Spotify playlist, or a page with pre-sale tickets to your festival.
Add gallery
Similarly, you can add a gallery, a card-style message, which you can add an image, a URL, and a title to, for instance. Again, you can add buttons underneath these card-style gallery items.
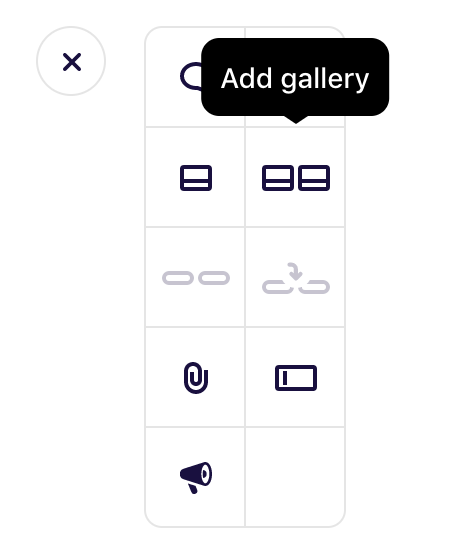
You can even have a gallery item link to Spotify, Apple Music or an RSS-feed, which will automatically fill out its image, title, subtitle and URL fields 😍
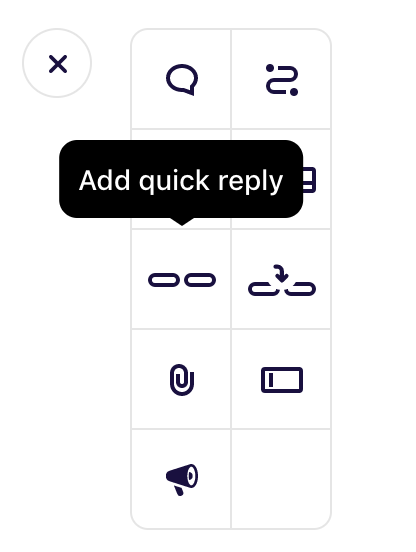
Add quick reply
So, you want to ask your subscribers a question…
Naturally, you don’t want to deal with the infinite amount of answers they could come up with - after all, language is defined as the ability to express infinite thoughts with a finite set of means.
Well, why don’t you just give your subscribers a finite set of answers instead, by adding quick reply buttons.
Here’s what that looks like in one of our own broadcasted Flows:

By adding quick replies, you create a little menu and give your subscribers pre-written options, so you can avoid having to deal with their freely written answers - which could be anything, from ‘Who is this?!’ to ‘wibeuofbweofuqbhwfe’...
Choosing either option leads to a different branch in your Flow, which can be edited separately. Cool, huh? 🕶️
Which brings us to…
Reinsert menu
Let’s take the example above.
Giving the option of quick replies through buttons creates a menu, which is saved and stored in POP’s dashboard.
Want to reuse these menus? Just click the ‘Reinsert menu’ button and you can choose from all the menus you have previously created. Just select one to add it to your Flow.
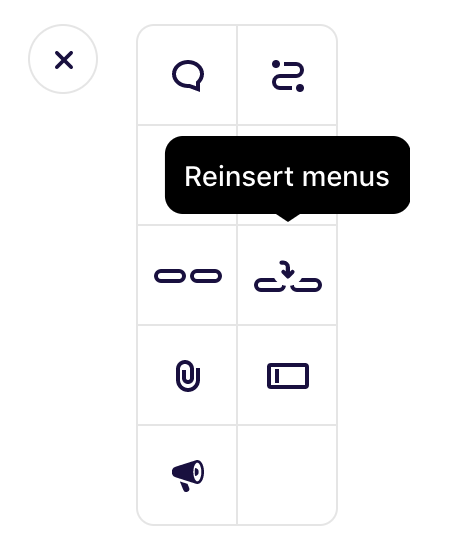
This convenient feature will save you a lot of extra work - no need to recreate every menu over and over again!
Ask for user data
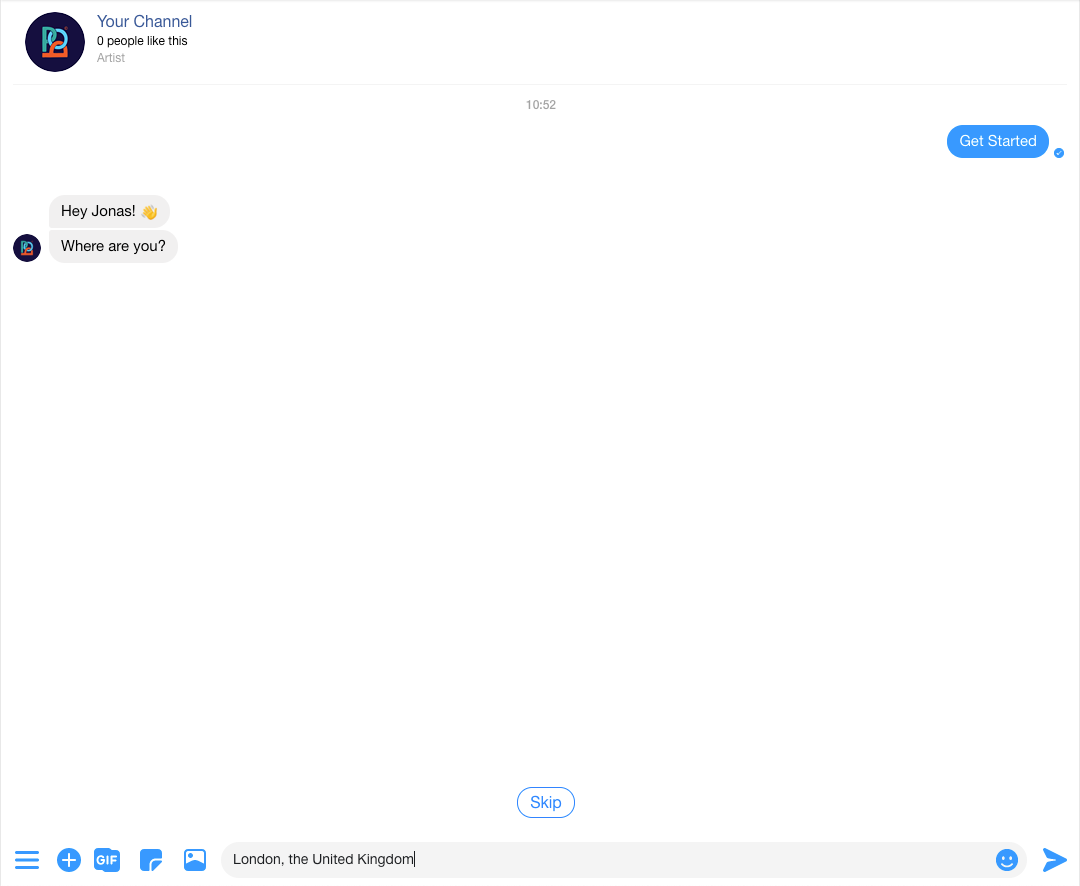
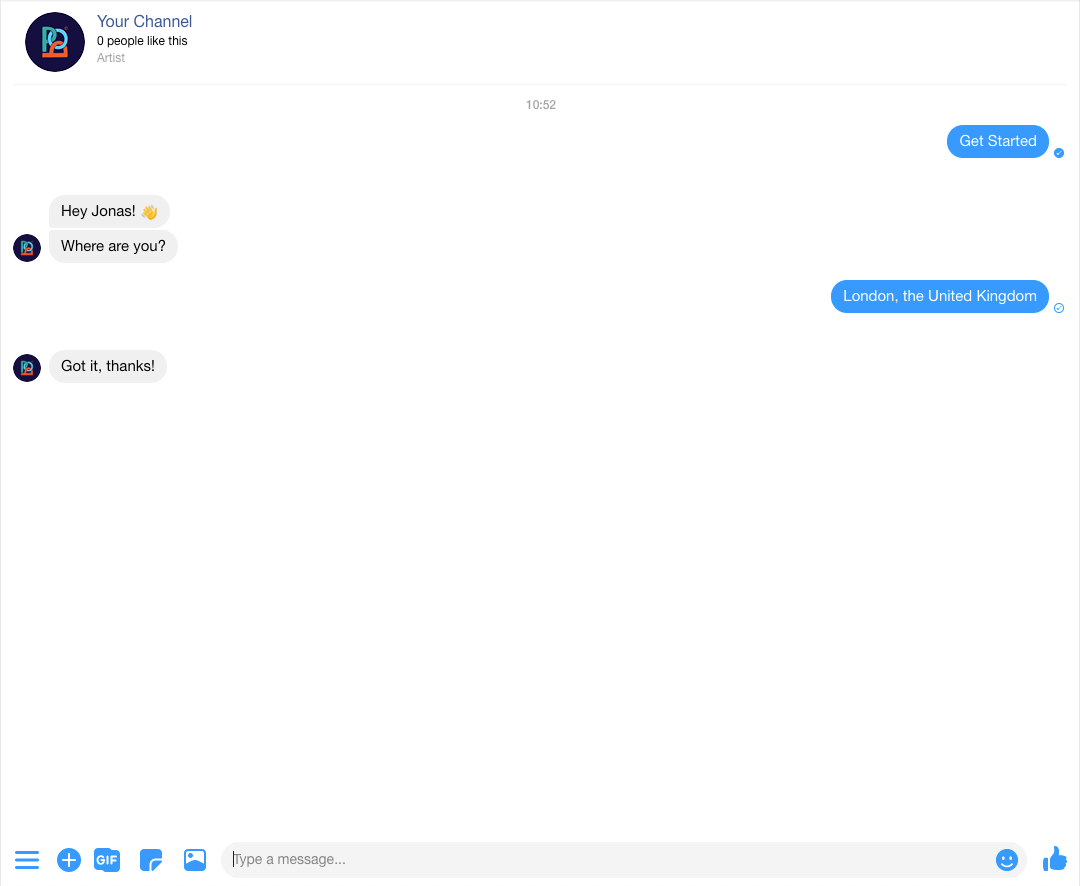
If you want to know more about your subscribers, you can ask them using the 'Ask for user data' component.
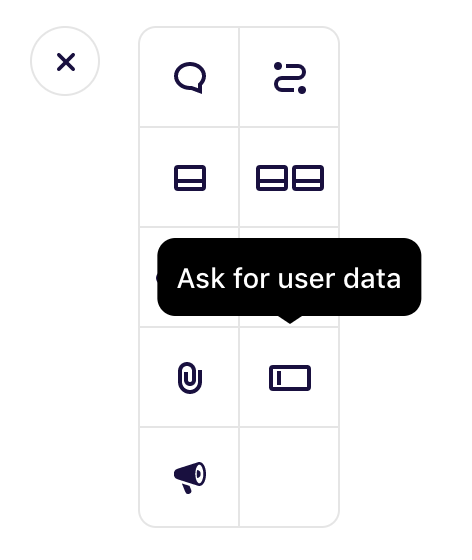
There are three types of data that you can collect using this tool:
- E-mail address
- Location
- Phone number
Choose one of these from the drop-down menu that appears when you add an 'Ask for user data' component to your Flow.
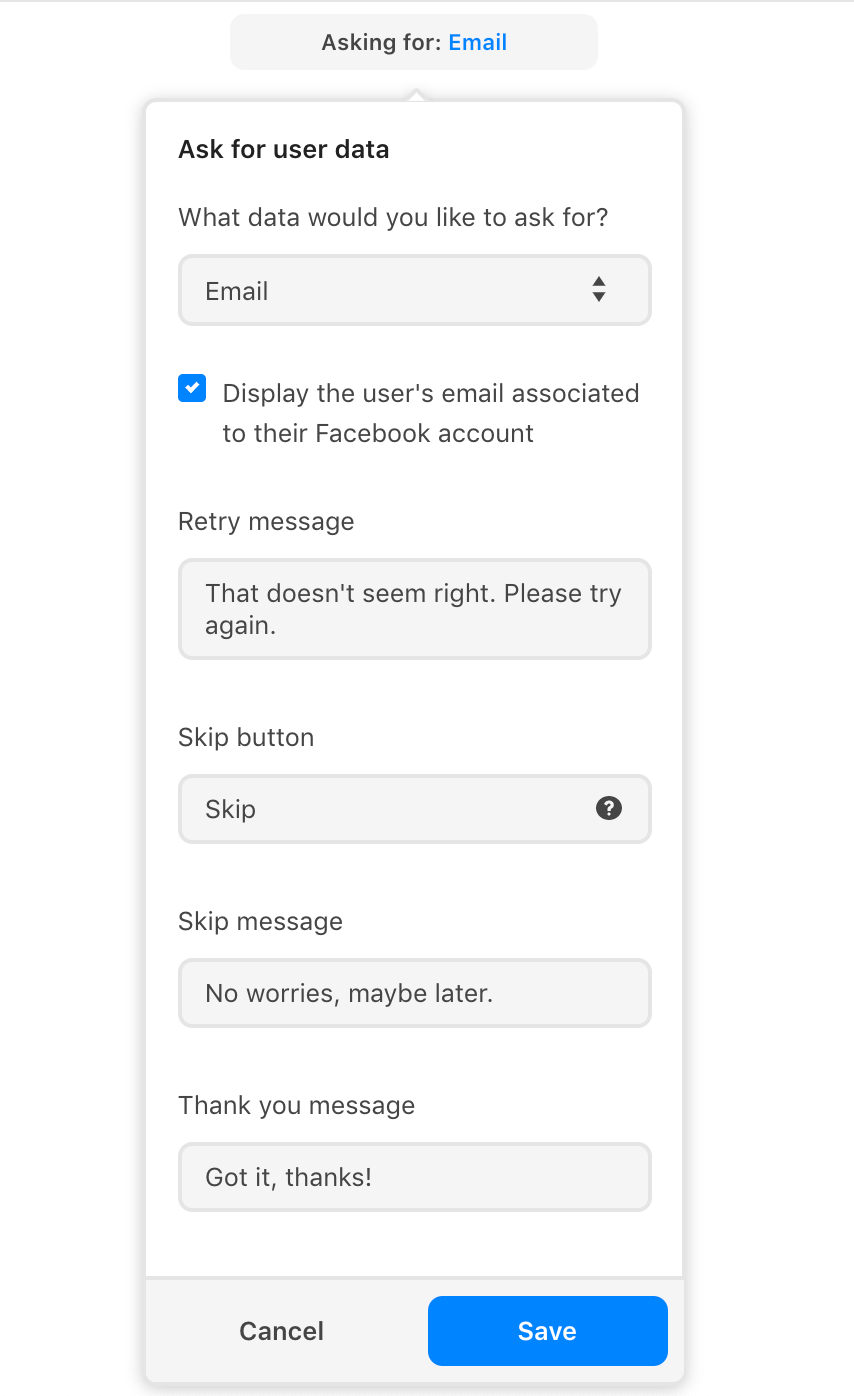
Every 'Ask for user data' component needs to be preceded by a textual question and can include a 'Skip button' if necessary.
You can also customize the 'Retry message' that's triggered in case the user doesn't provide the answer in the correct format.
Customize the 'Skip message' that users receive when clicking the skip button. Customize the 'Thank you message' that is triggered when users provide an answer in the correct format.
The data you gather with this component can be exported from the 'Audience' tab in the 'Statistics' section of the dashboard.
E-mail address
When asking a user for their e-mail address, they can respond in two ways:
- Typing the e-mail address
- Clicking on/tapping a Quick Reply button
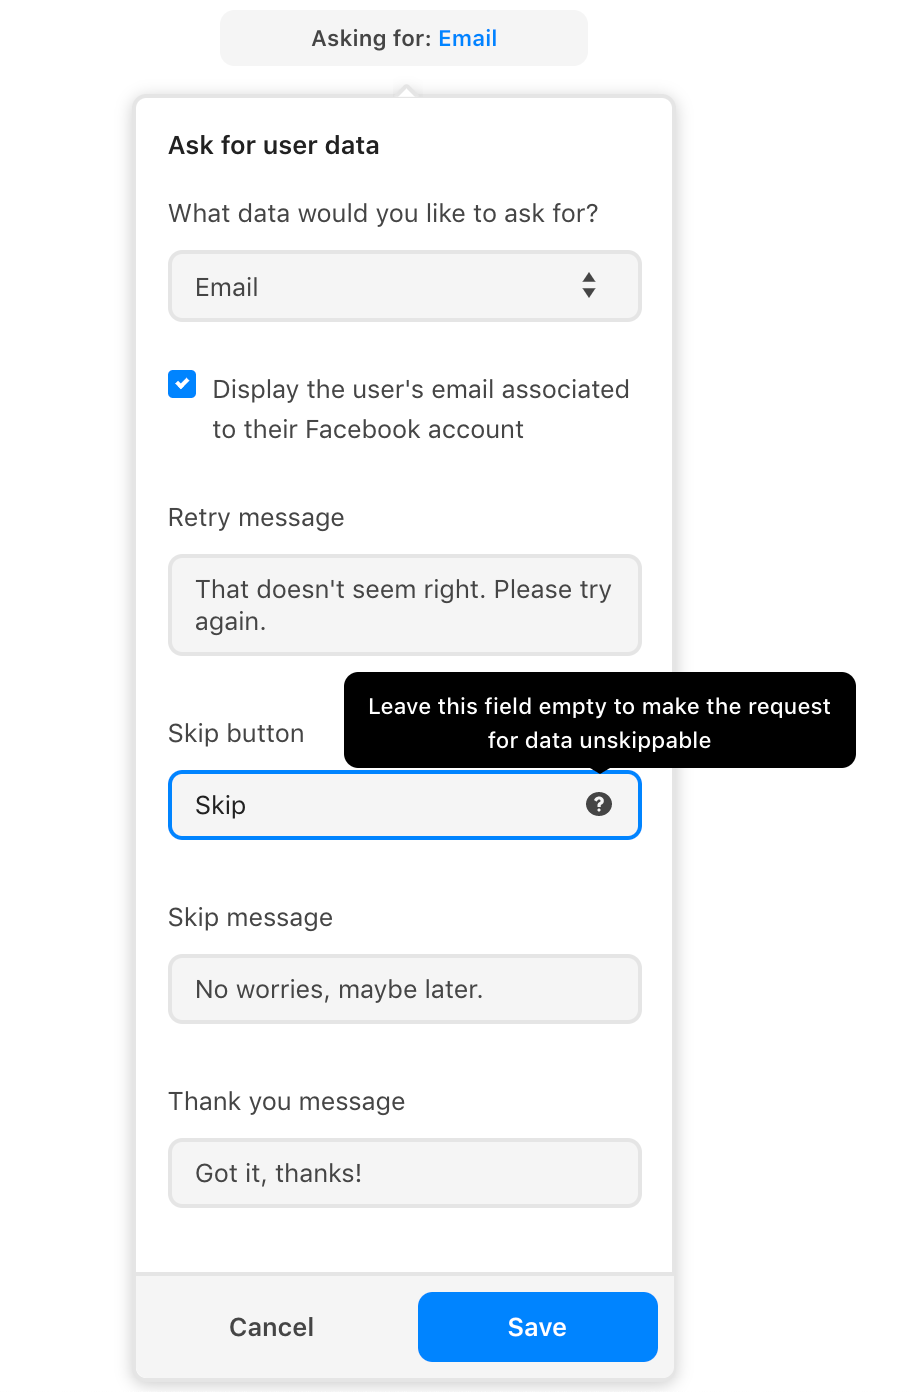
The Quick Reply button will display the e-mail address connected to the user's Facebook account. This gives the user the option to choose between this address, or type an e-mail address of their own choosing.
You can customize the copy for the 'Skip button'. This button allows the subscriber not to answer the question. Leaving this field empty makes the question unskippable.
NOTE: A user gets three attempts to input the requested data, in the correct format. If there is no 'Skip button' included in the component, the remainder of the Flow will NOT trigger after the third failed attempt.
Location
Asking a user for their location allows them to type their address in Messenger. The general format, here, is [City], [Country] and will be saved in the audience table in that way.
Phone number
Asking a user for their phone number works the same way as asking a user for their email address. This means users can respond in two ways:
- Typing the phone number
- Clicking on/tapping a Quick Reply button
The Quick Reply button will display the phone number connected to the user's Facebook account. The format for phone numbers means that it needs to start with a '0' or a '+' sign. Any parentheses will be disregarded.
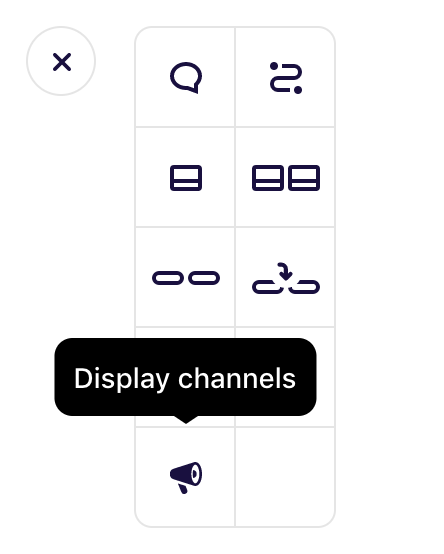
Display channels
POP allows you to segment users into channels (public, visible to subscribers) and segments (private, visible to you only). The ‘display channels’ component allows you to include channels in your broadcasts and Flows.
This can be either all channels, or specific ones. This component allows you to be more transparent in your messaging practices. After all, a marketing product’s quality can be measured by how easy it is for users to unsubscribe!
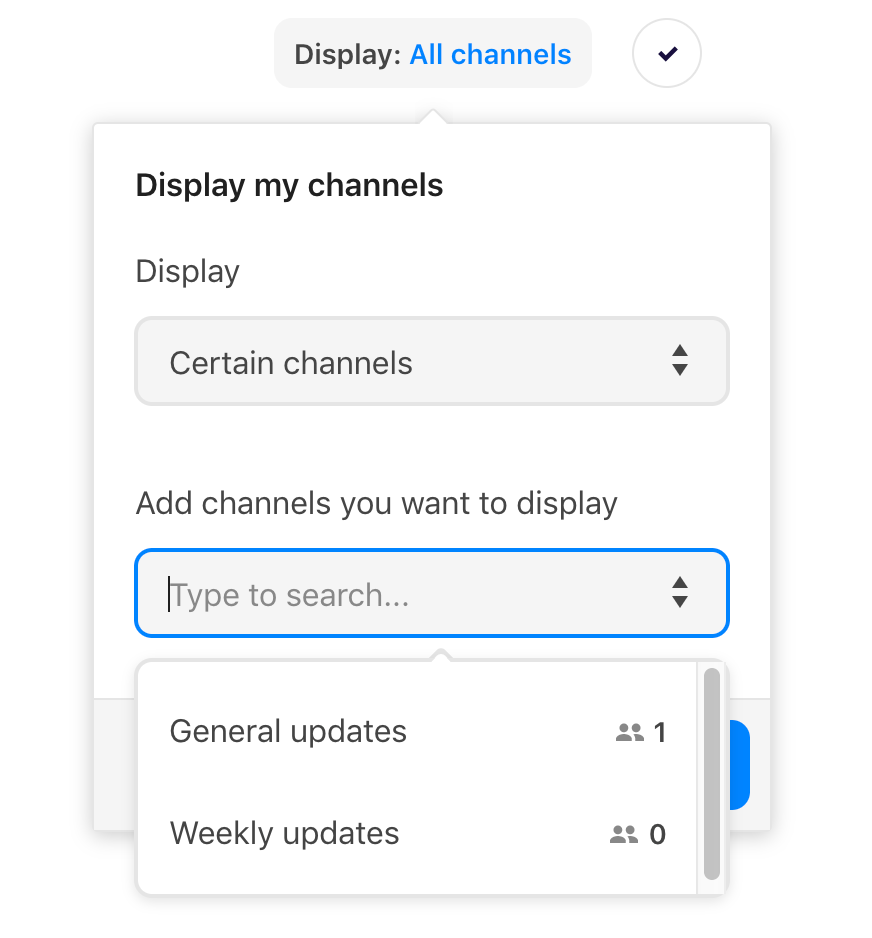
You can choose to display either all, or select channels in your broadcast or Flow. You can edit your channels and segments in the ‘Channels and Segments’ tab in the ‘Automated’ section. Add an image and a description to make them more visually appealing. In Messenger, channels will be shown like a card-style gallery component.
Use case: you sent out your weekly update broadcast, but want to make sure that everyone who subscribed to those is still happy receiving them.
Add a message at the end of the broadcast, saying:
“Are you still enjoying these weekly updates? If not, you can unsubscribe below.”
Add a ‘Display channels’ component, select the weekly updates channel, and send it out!
Here’s what sending out all channels would look like in Messenger:
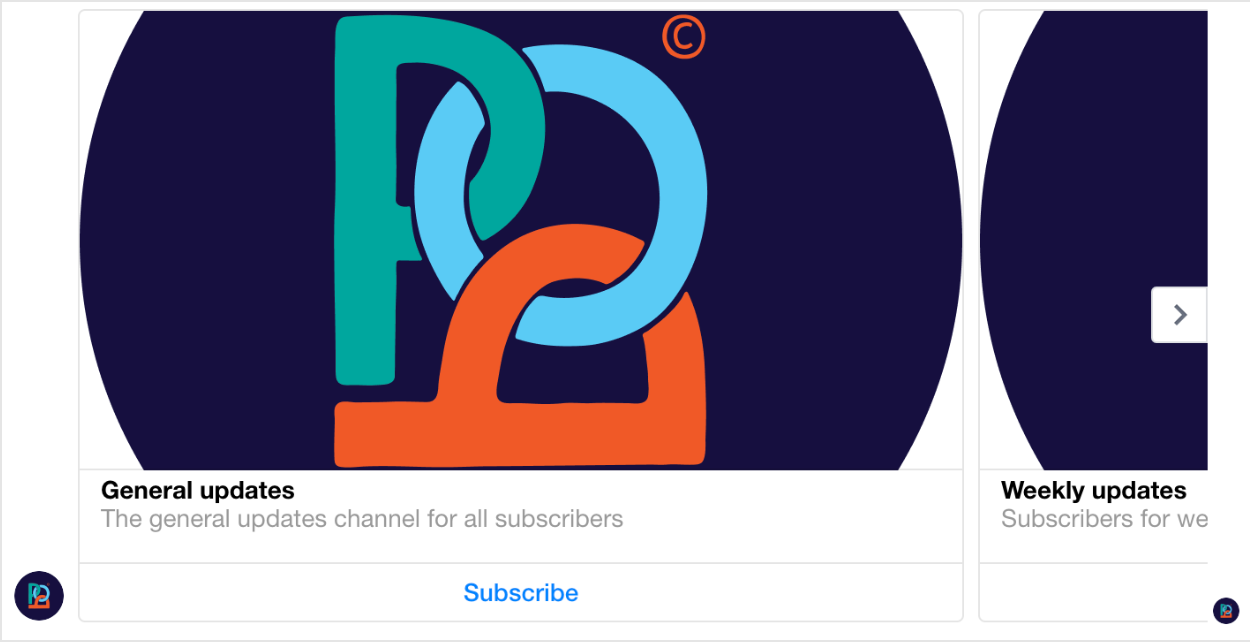
The buttons underneath the channels will say either ‘Subscribe’ or ‘Unsubscribe’, depending on the user’s current subscriptions - the copy for these buttons is editable in the ‘Channels and Segments’ tab, as well, by the way!
By now, you should be getting a general idea of how the Chat Editor works… (If we’re starting to bore you with our amazingly instructional guide 😴 why don’t you just give our tool a try?)
Satisfied? Done composing?
Just click the orange button in the bottom right corner of the Chat Editor to save it. Alternatively, you could click the blue button to preview the Flow in Messenger, and see what it looks like in action.
Save it, and the Flow appears in the same field in ‘Broadcasts’ where you can send messages directly. Just click on the orange ‘Send now’ button to send out your new Flow to all your subscribers at once!
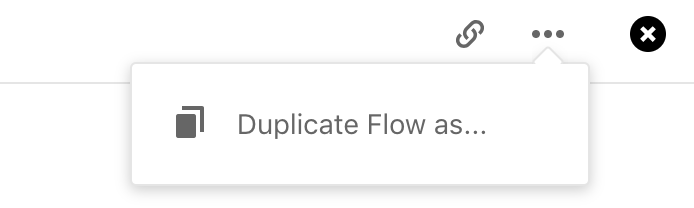
Pro-tip: Feel like this Flow is worth saving? Or would you like to continue editing later on? Click on the options button in the top-right corner of the Chat Editor, and select “Duplicate Flow as…” This allows you to save your Flow to the ‘My Campaigns’ section of your dashboard.
How to create, edit, and save Flows in ‘My Campaigns’
Creating a Flow
In your POP dashboard, venture over to the ‘Campaigns’ > ‘My Campaigns’ section to see a list of all the Flows you have previously saved.
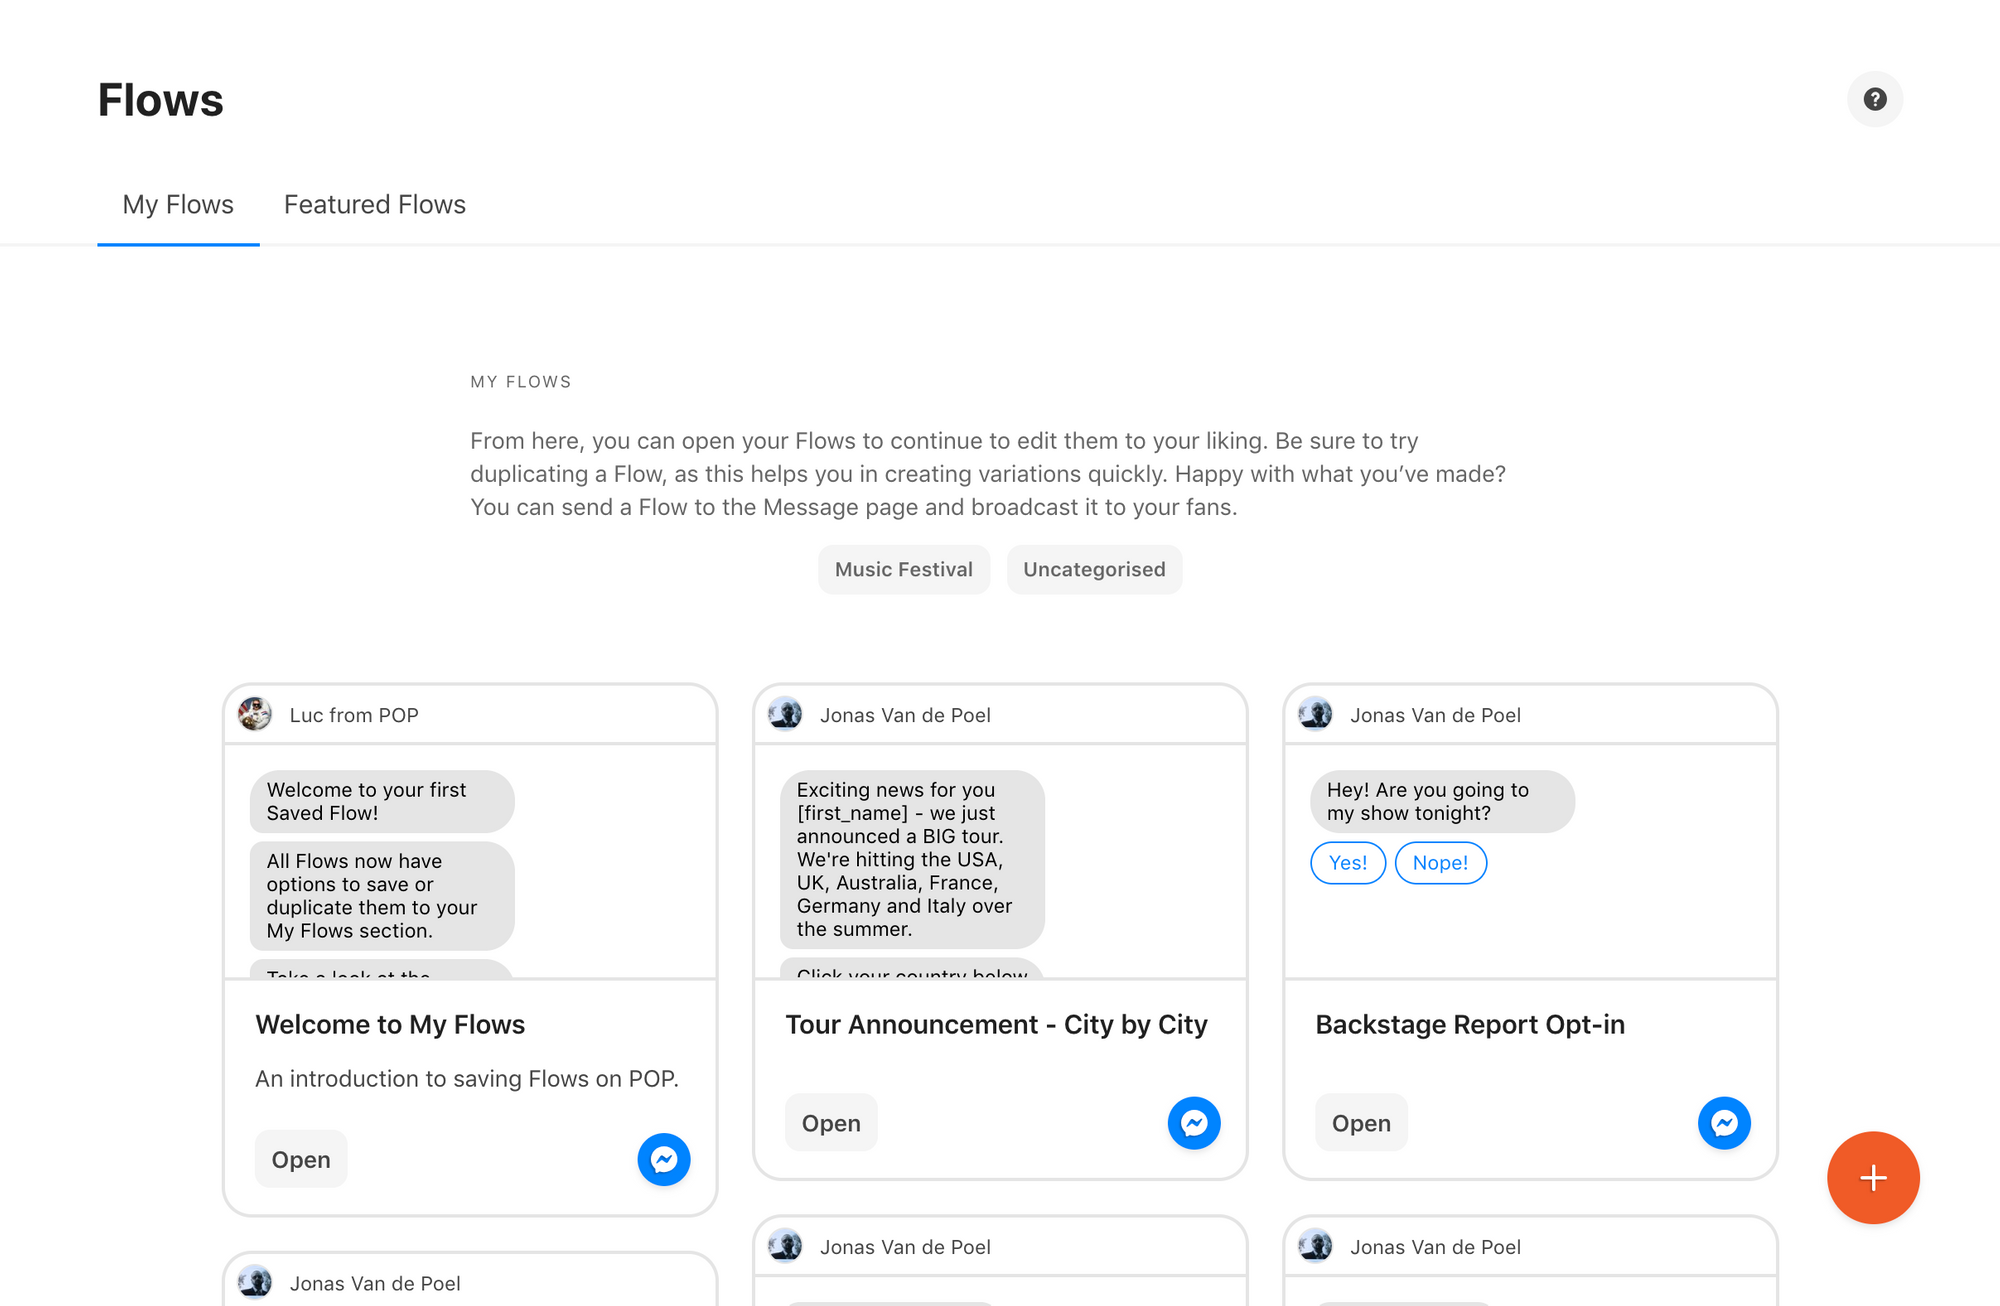
Here, just click on the big shiny orange button with the ‘+’ symbol to start creating a new Flow in the Chat Editor, open one of your previously saved Flows to edit them, or click on the ‘Preview in Messenger’ button to see what your Flows look like went sent out.
As mentioned before, we want to make your life and job as easy as possible!
Which is why we created...
Templates
In the ‘Campaigns’ > ‘Templates’ section we’ve compiled a bunch of template Flows you might find useful. You can preview these in Messenger, and if they’re to your liking, you can save them to ‘My Campaigns’ and edit the copy to suit your own needs.
What this means?
Less work for you… and the opportunity to get started right away! You don’t even have to use any of these template Flows. Just preview a few of them in Messenger to get inspired by the possibilities our tool has to offer!
Want to show off your latest products and boost sales figures? Check out our ‘Product Drop Notification’ template. Just save the template to ‘My Campaigns’ and edit its content. This is just one of many featured Flows that’ll help you get used to the way Flows work.
You can also preview all templates on our homepage!
Flows within Flows within Flows
Similar to the way you can reinsert menus that you created earlier, our tool allows you to create Flows within Flows, or to embed Flows into a Flow you are working on. Let’s give you an example of how this feature might come in handy.
This is what POP’s introduction Flow looks like in the Chat Editor:
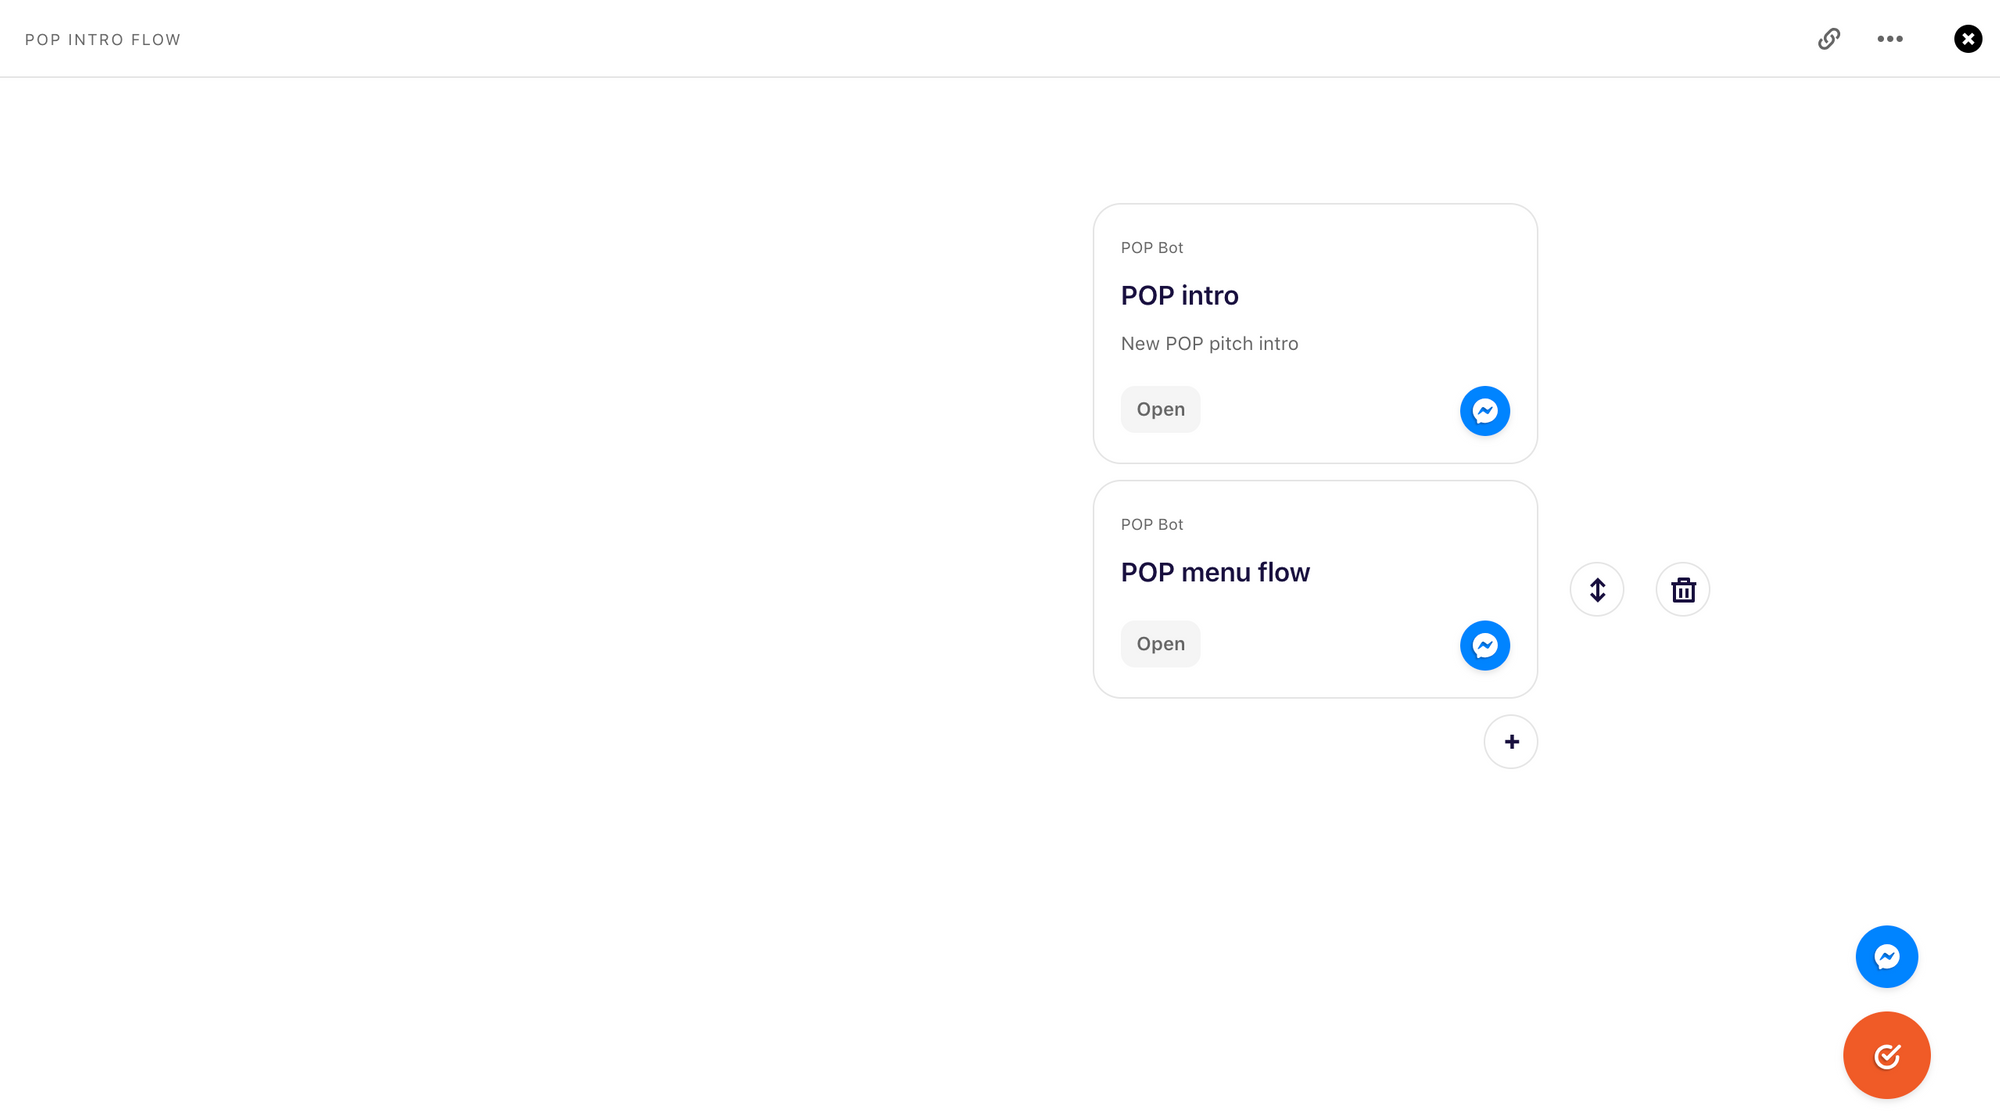
See how we’ve embedded a ‘Menu Flow’ there, as well? What this entails is that, when you’ve run through the intro Flow, the menu Flow will automatically follow. Let’s see what this ‘Menu Flow’ looks like when we open it:
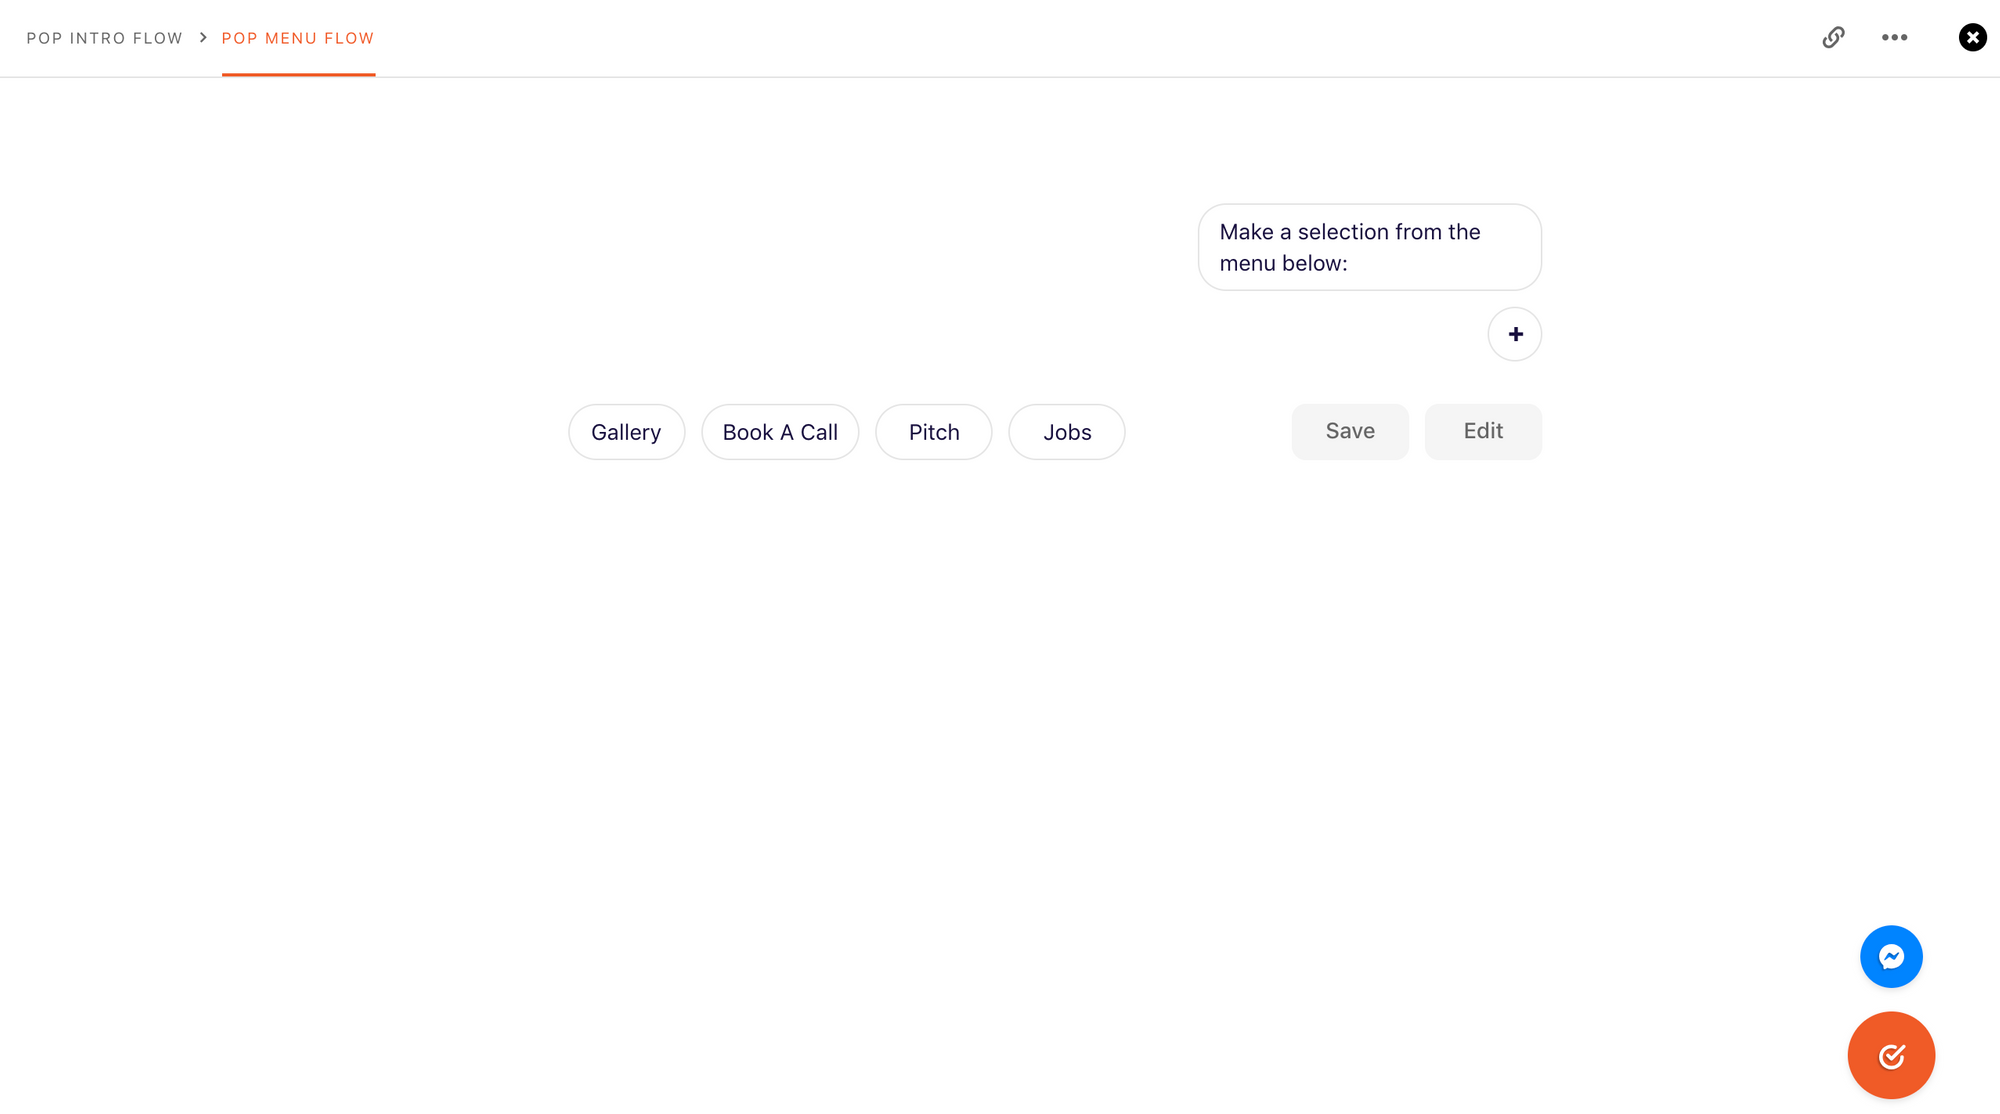
This embedded Flow links back to the overarching Flow, to create a loop in the chat UX
In this Flow, you can select quick reply buttons to make a choice between several options. Select jobs, and we’ll link you to our job openings. After that, we re-embedded the ‘Menu Flow’, so you can check out the other menu options.
(Did I hear someone say ‘Flowception’...?)

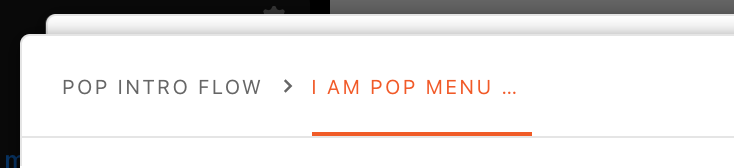
You can always take a peek at the top left corner of the Chat Editor to figure out where in the flow hierarchy you are currently working:
The Automated section
Apart from the ‘Introduction’ tab in the ‘Automated’ section, there are two other tabs to be found: the ‘Persistent Menu’ tab and the ‘Replies’ tab.

Let’s take a quick look at both of these:
The Persistent Menu
The persistent menu is always shown at the bottom of a Messenger channel. It's where users can manage their subscriptions and browse a menu containing a Flow.
The persistent menu is a menu that is always visible to the user. Hence the name: persistent menu. On Messenger.com in the browser it shows like this:
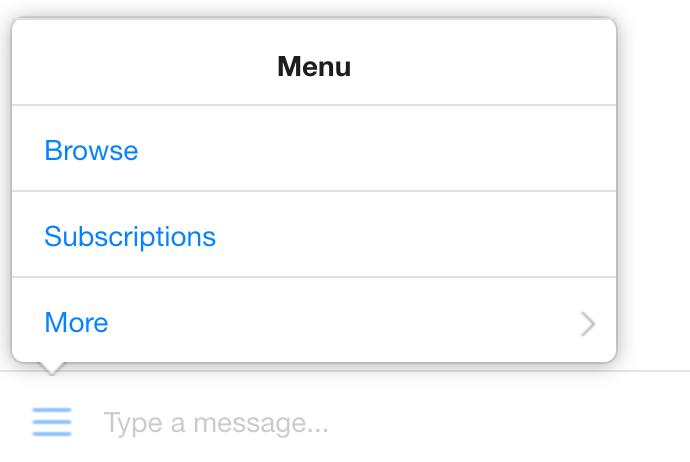
On mobile devices, it's shown much more visibly:
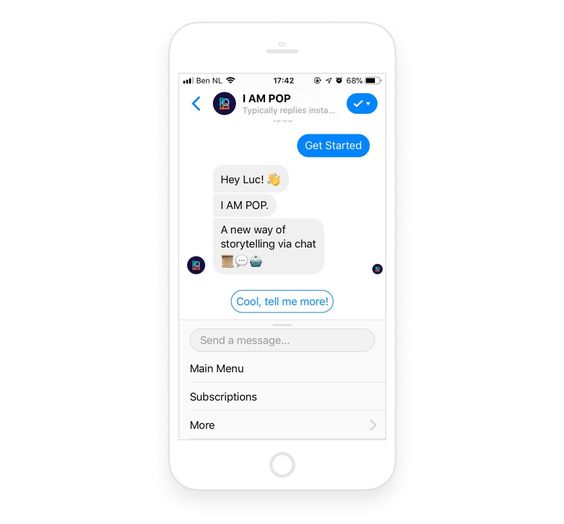
Here, the persistent menu is always open, and you just need to scroll down to see all of the menu items.
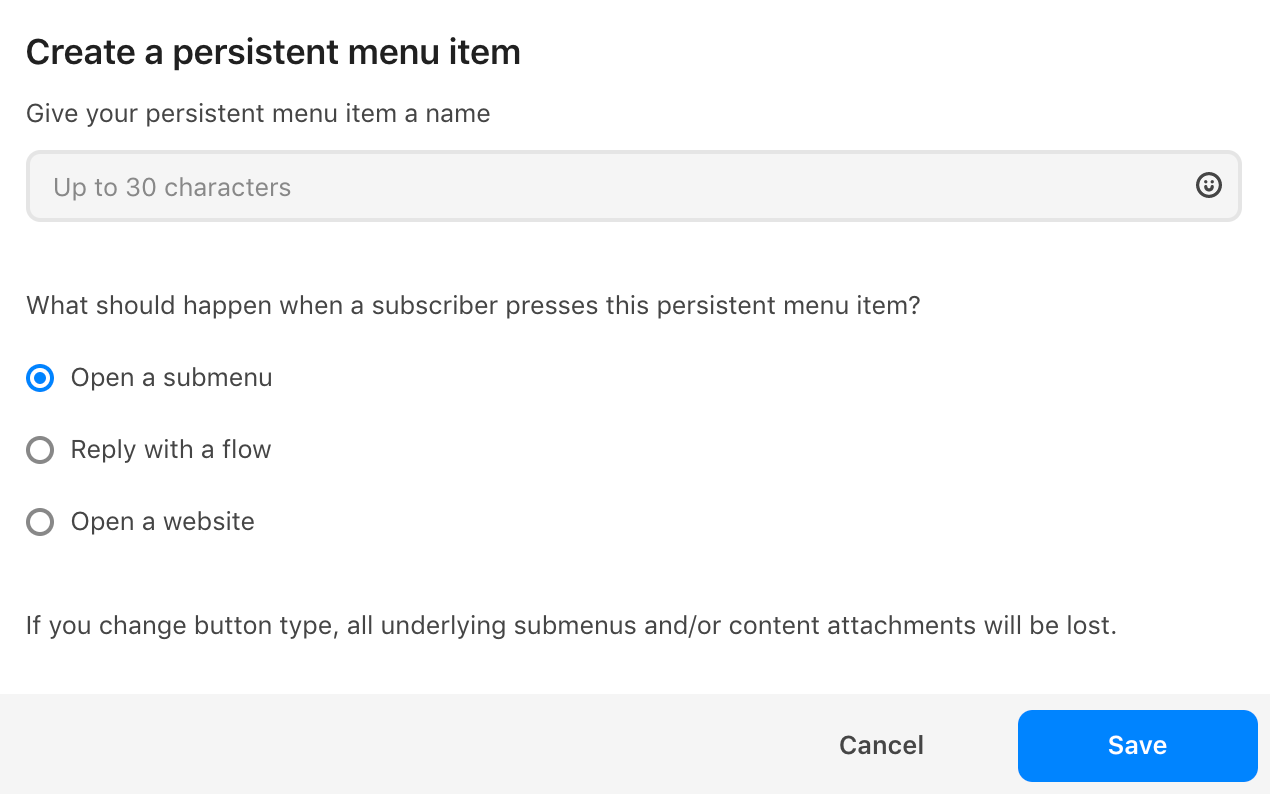
Editing the persistent menu items
Every main item like Main Menu and Subscriptions (as seen in the examples above) is editable. You can rename it, change the order and change what is shown to the user when it is pressed.
This is where you can edit the persistent menu in the dashboard:
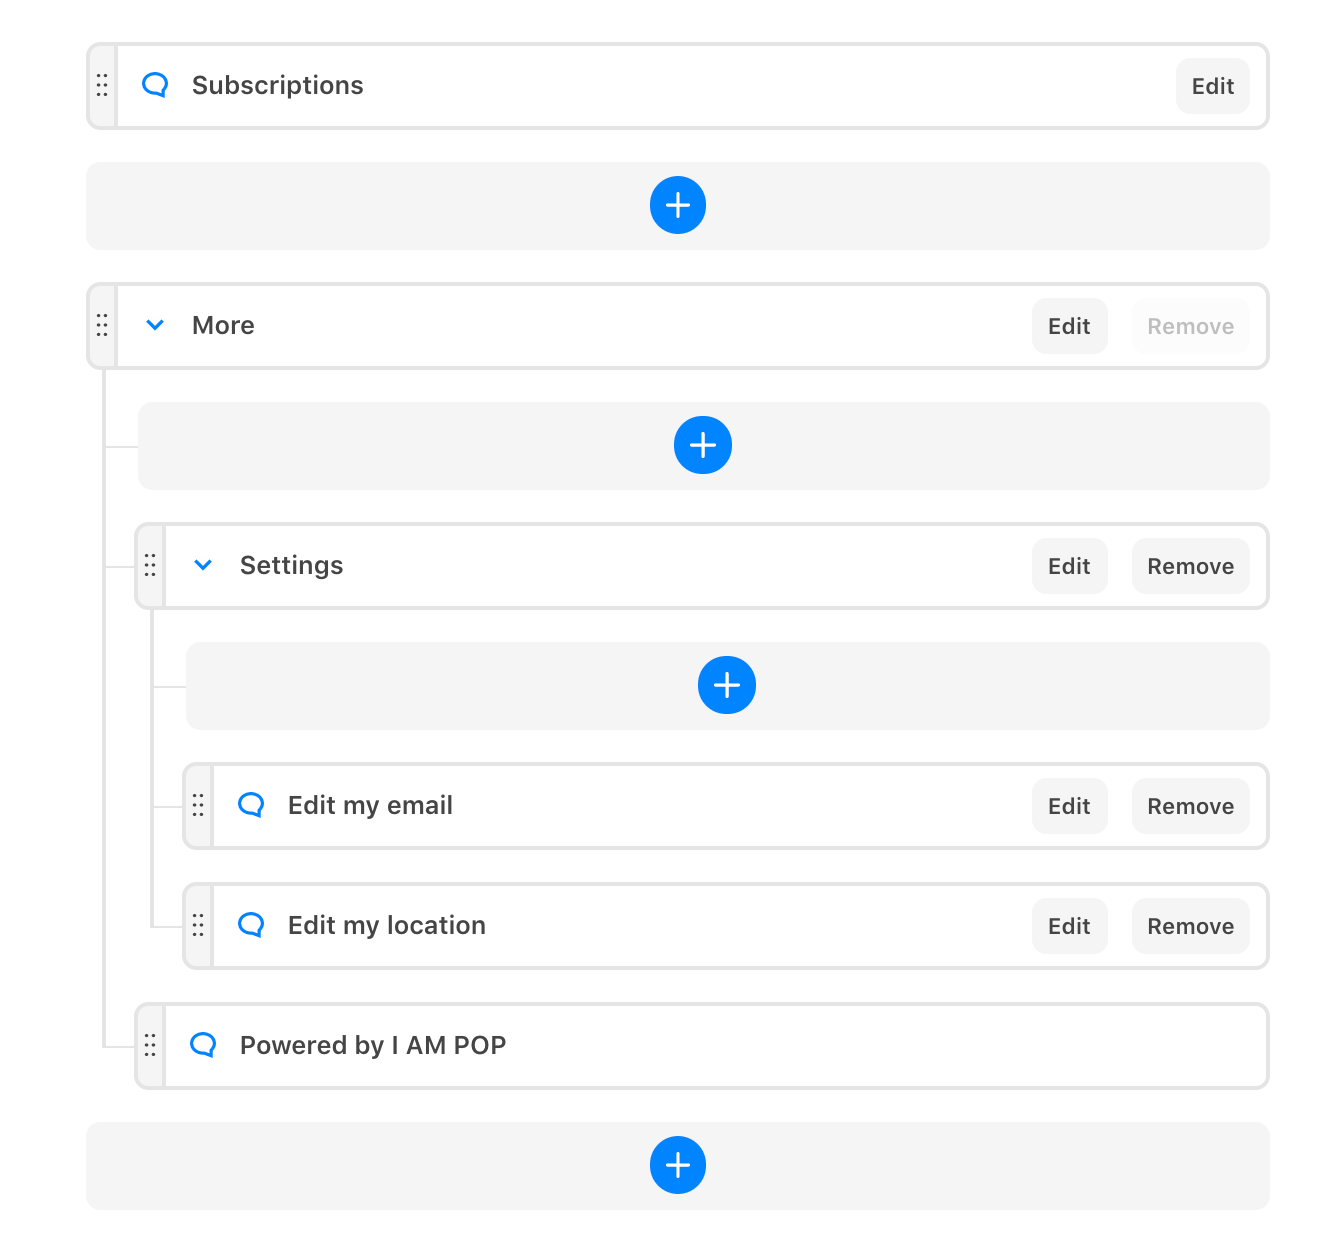
A persistent menu item can:
- Open a submenu of up to 5 persistent menu items (limited to 3 levels deep)
- Open a website
- Open a Flow
Allow users to send messages to me
You may not be interested in receiving messages from your audience at all. This is perfect for very large audiences or to perfectly guide your user through content with your Flow, instead of needing to catch any text they may type to you.
Show persistent menu
You could also completely hide the persistent menu if you don't wish to make this a part of your experience. In doing so however, a user can't reach the mandatory Subscriptions persistent menu item. This means that by disabling this option, you won't be able to send broadcasts anymore.
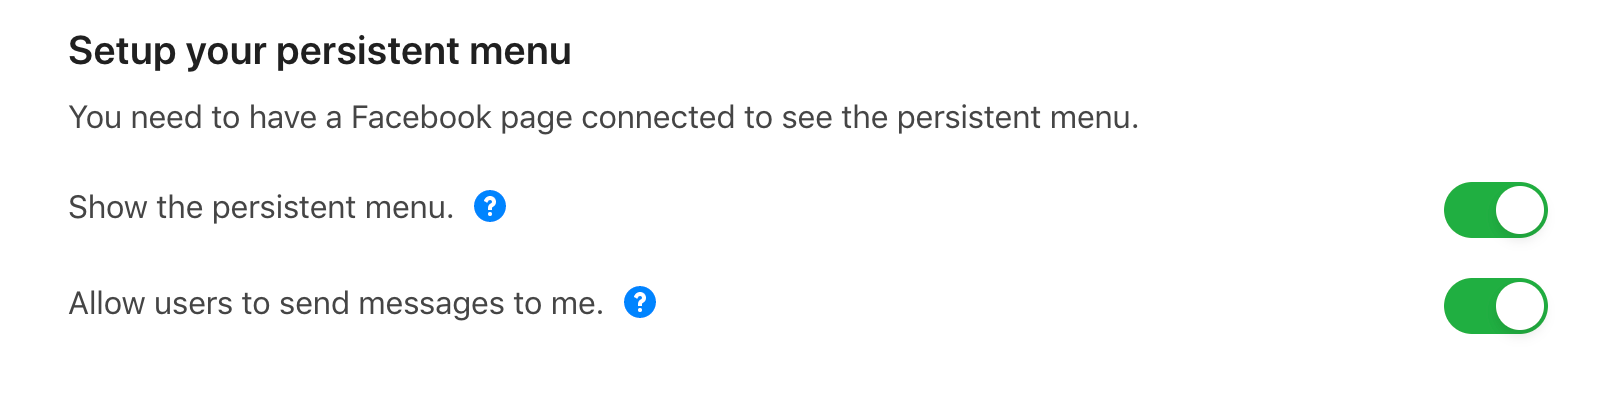
In short: If you don't allow users to send you messages, the persistent menu has to be shown, so users can always unsubscribe by managing their subscriptions through the menu.
Please note that changes to the persistent menu are shown immediately in the desktop client, but may take a few minutes to be visible on the mobile version of Messenger.
Pro-tip: You can find all the channels you've created in the Channels and Segments tab of the Automated page shown above. Track how many subscribers are in each channel, or reorganize/edit/delete the channels themselves
Last but not least, let’s chat about…
Replies
Imagine you want a Flow to be triggered by a certain word or phrase. No problem!
Just head over to the ‘Replies’ section of the dashboard, where you can do one of two things:
1) You can add words or phrases that trigger reply
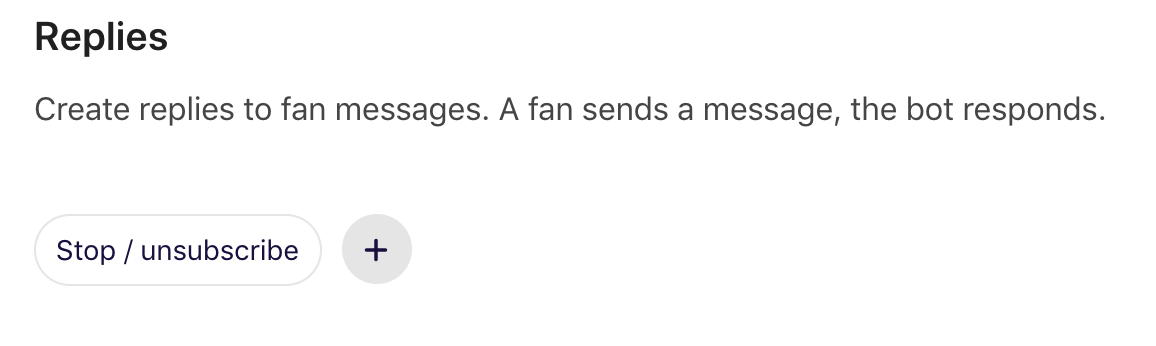
As you can see, a standard ‘unsubscribe’ reply is already included by default. Typing words such as ‘stop’, ‘unsubscribe’, ‘unfollow’ etc. automatically lead to an unsubscription and trigger an informative Flow. We’ll show you a cool example of what else you could use replies for below.
Clicking on the ‘Stop / unsubscribe’ button opens the Chat Editor, and allows you to draft your reply and the words/phrases that trigger it. Clicking on the + symbol allows you to add a new reply.
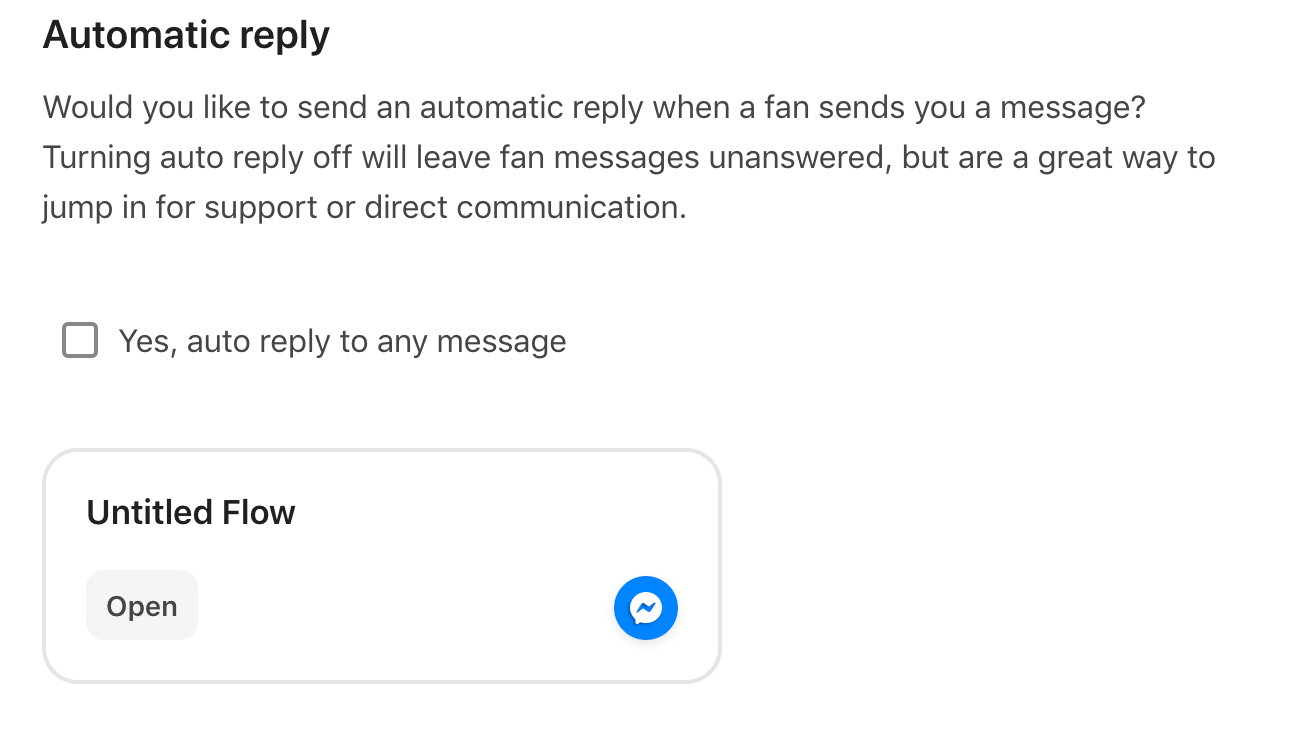
2) You can set up an auto reply
If you don’t feel like responding to your subscribers typed messages, you can set up an auto reply. This is disabled by default, but you could enable it and edit a Flow that explains that you’re not able to respond to any of their typed messages. You’re just using the Messenger channel for outbound messages 🤷
Now here’s that cool example we were telling you about… Imagine this: You know you’ve got a big release coming up, and you’re desperate to get more fans to subscribe to your Messenger channel, so you can hit them with an exclusive pre-sale link.
Share your ‘m.me’-link in a post across your social channels, telling people to type the phrase ‘EXCLUSIVE GOODIES FOR ME’ in your Messenger channel. Then set up an reply for that phrase, and segment subscribers into a channel where you will share the pre-sale link. You get the point, right? This way, you will grow your subscriber count, and really get your fans involved, at the same time!
Pro-tip: the replies aren’t case-sensitive. Which means you can set the reply to ExCluSiVe GoOdIeS FoR mE and still get the same results. Pretty neat, right?
What are you waiting for?
GET STARTED with the Chat Editor ASAP! And if you manage to build something cool, let us know!
P.s. It's free up to 100 subscribers, you know...
Tutorial: A full guide to the Chat Editor
By the way, we've collected and uploaded our most popular resources. You can download these resources for free!
Or why don't you connect to POP directly through Messenger at https://m.me/bypophq